How to Add a Realistic AI Girl to Your Video Using Google AI (Step-by-Step Tutorial)
Hey guys! How are you all doing? 👋 In today’s post, I’m going to show you something absolutely mind-blowing — how you can add a realistic-looking girl to your videos using AI. The results are so real that no one will even notice that it’s AI-generated! 😲
Whether you want to add a girl into your video or just create a short AI-generated scene using only an image, this tutorial is for you. Let’s get started!
Step 1: Open Google Gemini (Google AI)
First, open your Google Chrome browser — it’s available on every smartphone. Once open, go to the search bar and type “Google Gemini AI” (or simply “Gemini AI”).
You’ll see the official Google Gemini link at the top. Click on it and enter the site. You can also visit directly via this link:
👉 https://gemini.google.com
Once you’re in, you’ll notice a “+” button — click on it and then choose Upload File → Photos & Videos. Now select any photo from your device that you want to edit. Once uploaded, the photo will appear on your screen.
Step 2: Select the AI Model and Enter Your Prompt
After uploading the photo, click the Create Image option and make sure to select the “Nano Banana” model — this is Google’s most advanced and realistic AI image generator model.
Now it’s time to write your AI prompt. You can use the following example:
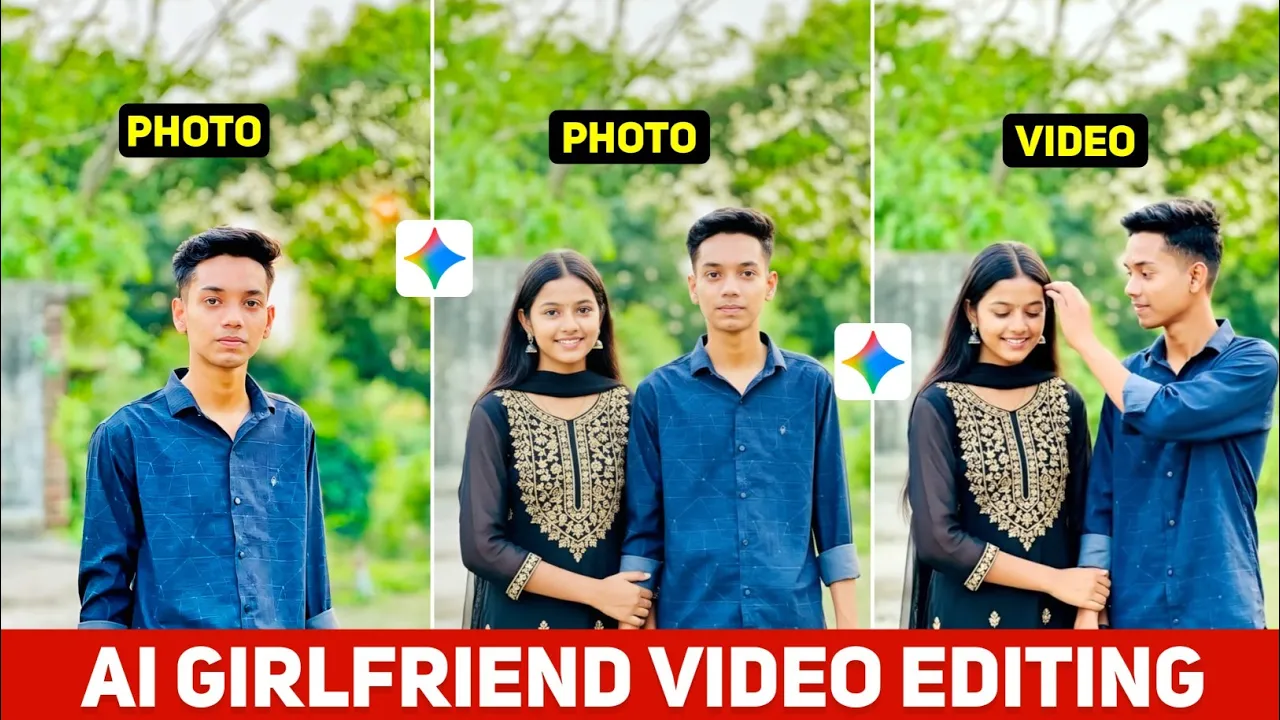
Add an Indian girl hugging a boy, both smiling, wearing traditional clothes (kurti and jeans), in natural lighting, ultra realistic.If you want to customize it, just change the girl’s nationality or outfit — for example, replace Indian with American or wearing kurti with wearing modern dress.
Once your prompt is ready, hit the Send button and wait for a few seconds. The AI will process the photo and generate a new version where the girl has been added — completely realistic!
💡 Tip: You can modify your prompt for different scenarios — for example, “holding hands,” “walking together,” or “sitting on a bench.” The AI understands natural descriptions!
Step 3: Convert the AI Image into a Video
Now that your image is ready, let’s convert it into a video. Go back to the Chrome home screen and search for “Google Flow AI”. You can also visit it directly here:
👉 https://flow.google
Click the link and enter the website. Once there, choose the option Create with Flow. Then click New Project → Frames to Video. This feature allows you to transform images into short AI-generated video clips.
Now click the “+” button to upload your newly generated photo. You can select either Portrait or Landscape format depending on your video needs. I recommend Portrait for Reels or Shorts content.
Once uploaded, click Crop & Save. After a short wait, your image will appear in the workspace.
Step 4: Write a Text-to-Video Command
Here comes the fun part! Just describe what action you want in your video using a short prompt. For example:
The boy gently fixes the girl’s hair, then smiles and hugs her lovingly. Realistic animation, cinematic lighting.Click Send — and wait a few seconds while the AI processes your command. Once done, your AI-generated video will appear automatically with smooth movement and even background music!
Yes, that’s right — Flow AI automatically adds suitable background music to match your scene. Pretty cool, right?
Step 5: Download and Save Your AI Video
Once you’re happy with the result, click on your video and choose the Download option. Select “Original Size” for the best quality. The video will now save directly to your device.
⚠️ Note: Google Flow AI currently allows only 5 free videos per account. After that, you can sign out and use another email to continue creating more videos.
Alternative Free Tool
If you want an unlimited free option, try GKI.ai — it allows you to create as many AI videos as you want. However, the video quality is slightly lower compared to Google Flow AI. For best results, I still recommend Google Flow.
Final Thoughts
And that’s it! 🎬 You’ve just learned how to add a realistic AI-generated girl into your videos using Google Gemini AI and Google Flow AI. This method is super fun, easy, and gives professional-looking results without any complex editing software.
Remember — this tutorial is only for educational purposes. Please don’t use these tools to mislead or harm anyone. Always create responsibly and ethically. ❤️
If you found this guide helpful, make sure to check out:
Stay creative, stay inspired — and see you in the next tutorial! 🚀

📢 Join Our WhatsApp Channel
Get daily AI photo editing prompts, tools, and tips directly on your phone.
Join Now on WhatsApp 🚀